Saturday, April 16, 2011

CHAPTER 4 – Jan. 16, 1981 . . . . . . . . . . . . . . . . Pouring the concrete slab

The foundation forms . . . ready for concrete.
For a number of years after this cold, January date, Anne and I celebrated our "Slabiversary." It was a long, hard day of work. A day of near-disasters. But also a day of success.

Five cement trucks from Centex Materials – carrying a total of 44 cubic yards of concrete – made their way to the job site. That was $1663.20 worth of concrete.

Almost from the start, the day took an ominous turn:  A cement truck sank into the septic tank.  One of the forms on the highest corner of the foundation began bulging out with concrete because I had forgotten to drive a couple of nails. 

But meltdowns were averted and it all worked out.

Thirty years later, some members of the volunteer brigade still carry scars. Cement burns, for example. There were five of us in the work crew: Dominic (my Dad), Jimmy & Glen Long, Dave Mosteller, and myself. Joining us later in the day to bear witness and provide good cheer were other family members.

I tried to plan for everything – I even rented a gasoline-powered trowling machine, not realizing that a person actually needs a lot of experience using such a machine. I had watched laborers use such a machine and they made it look easy!


Glen and Jimmy Long were among the first to arrive. It was a cold morning so we built a fire out of scrap wood. Glen warms himself by the fire (left), while Jimmy prepares to don rubber boots.


Below: A brief video of slab-pouring day. The original Super 8 home movie was filmed by Mary Yemma Long (my sister). I constructed this narrated version in May 2011.  Yes, there is footage of the cement truck collapsed into the septic tank!

Forty-four cubic yards of curing concrete.

Chapter 6 sneak preview:  The Quarrymen
Rocking to a 90-lb. jackhammer, Paul Yemma and Mark Sims help dig the "pig hole."


TO BE CONTINUED . . . . . . . . . . . . . . . . . . . . . . . . . . . .
Chapter 5:  Repairing the septic tank that the cement truck crashed into.


Thursday, April 7, 2011

CHAPTER 3 – December 1980 . . . . . . . . . . . . . . . . Getting by with a little help from my friends

Actually, help from my family.

With the Christmas holiday season approaching, I was blessed with a ready-made pool of volunteer labor as several of my brothers returned to Austin. Amid the beer, bonfires, barbecue and bottle-rockets, rapid progress was made on the house foundation.

Billy was on semester break from Stephen F. Austin State University.  Andy came down from Des Moines, Iowa, and loaded up with firecrackers and bottlerockets for the holiday.  Paul was on break from Austin Community College. And Jimmy Long, a brother-in-law who is a brother, took time out of his busy schedule working on a PhD at the University of Texas to help shape the dirt.


Now that the big dirt pile was gone, I could get clear lines of sight from corner to corner. With my Dad's help, we patiently squared off the lines so that we had a rectangle rather than a parallelogram. We managed to get the diagonal lines to measure within 3/16 of an inch – almost perfect.  It is important to start out as perfect as possible with the geometry at the base because any errors are compounded as the house framing goes up. By the time you get to the roof, any major error on this geometric dirt pile would mean rafter angles that don't match up.
Once the rectangular lines were up and leveled (we rented a builder's transit), we could start building the outer forms. These old boards came from the demolished Perry Rose Firestone in downtown Austin.
 

Rebar in the internal footings. With Jimmy's advice, I used #5 (5/8") steel along the bottoms of the footings and #4 (1/2") along the tops.  The steel is tied into the 4 piers that go down to the undisturbed limestone.


Along the front edge of the future house, I inserted large bolts through the forms – to be used to attach a wooden deck to the concrete.
 

Detail of the internal-footing reinforcement tied into one of the piers near the downstairs bathroom.

Billy and I dug out this footing at the back of the house. The white pipe is the main sewer drain that runs out to the septic system – repaired after a backhoe mishap.

Below: Forming around the front-porch inset. This part was a hassle.

Front corner. At left, some of the bolts that a wooden deck will attach to.
New Year's Eve: During the day we made a party of the work. Billy, Tracy, Andy and I came out early and grilled hamburgers over an open fire. While 3 of us bagged dirt, Andy shot bottlerockets at us and "tended" the hamburger fire and cooler of Pabst Blue Ribbon.

Later, Anne, Mary, Jimmy, Zach, Paul, Dave Mosteller, Mama and Daddy all came out to join the festivities. After pigging out on burgers and drinking a few dozen beers, Billy put everyone back to work filling sandbags. That included Zach, who wasn't quite 2 – but it excluded Andy, who was still shooting bottlerockets.

Together, we filled about 150 bags – about 15,000 pounds worth of dirt and sand.  In the evening, we all went back to Havenside and Mama fed us.   (I didn't record in my journal what she fed us, but I'd bet good money it was spaghetti and meatballs.)


Billy working on the back footing – and the job-site Chevy Vega.
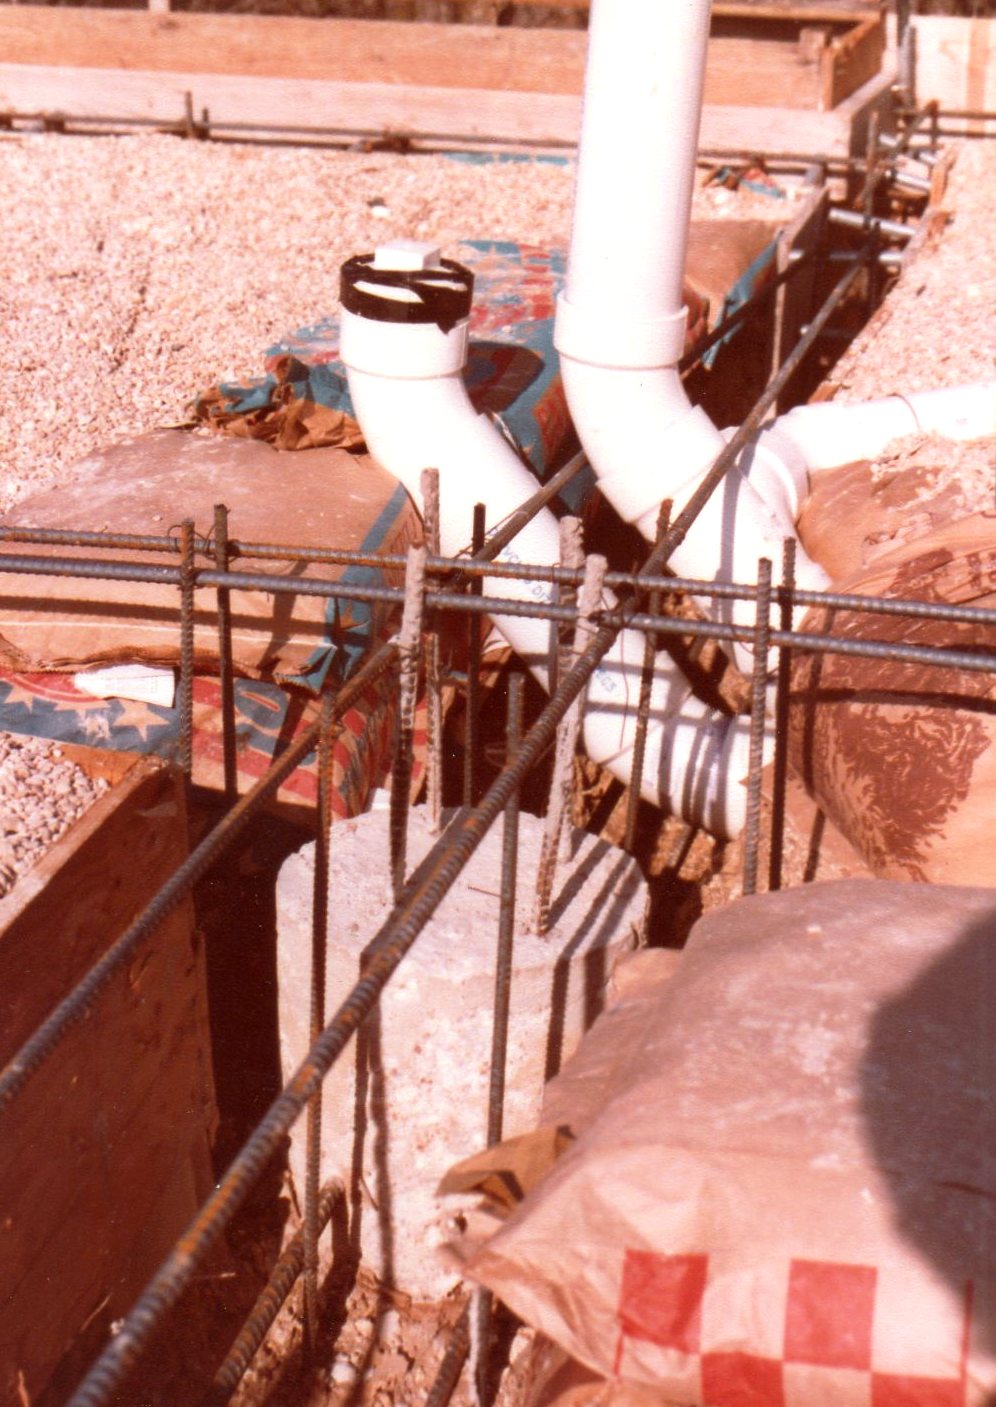
Wooden boxes cover plumbing pipes – these will form voids in the concrete so that I can connect the bathtub and toilet drains at a later date.
Early January: After Billy's help digging out that back footing, we made the final push and completed the forms around the foundation.

Below, Jan. 15, 1981:  One day before the concrete-pouring.
On a cold, clear Texas day, Dominic came out and helped me put the final touches on the project to get it ready for concrete.  For a living room that would be slightly sunken, we formed a 7" step-down all the way across the foundation.
Next, we installed a polyethelene vapor barrier over the dirt to keep moisture from coming up into the house. After that, we affixed steel re-mesh over everything.  (At top-left is the board that forms a step-down into the living room.)

Final prep: We added a couple of leveling boards down the center of the foundation so that we could screed the concrete with long boards.  The leveling boards would be removed once the concrete was fairly level. We were ready to pour concrete the next day.

BELOW:  Sneak preview

Billy works on 2nd-floor joists.  Ask him why I covered the lower left of this photo with a post-it note.

TO BE CONTINUED . . . . . . . . . . . . . . . . . . . . . . . .

Chapter 3:  Pouring the concrete

Saturday, April 2, 2011

CHAPTER 2 . . . . . . . . . . . . . . . . . . . . . . . . . . . . . . Oct. 1980 – Installing rudimentary utilities and beginning to shape the foundation

Before I could do much more, I needed to get water up to the house area. That meant digging an 80-foot trench, which took me six days, working a few hours each day after I got off work at Travis High School. There is a thing called digging, and another thing called "chopping through rocks."  This was the latter.

After paying Travis County "Water District 18" a small fee to install a meter at the street, I enlisted the help of my Dad to run a 3/4" copper tubing supply line through the trench, up the hill to the foundation area of the house.

Sweat expertise: Dominic joins sections of copper tubing, a process known as "sweating" that involves using solder and a blowtorch.  He had retired in 1979 after 20 years with the Federal Aviation Administration (preceded by 20 years in the Air Force). In retirement, he had considered building a new house near Barton Creek, but then changed his mind. He was always happy to come out and give me help and advice, and I think working on this project satisfied in him a same need that it satisfied in me.

In the early 2000s: A few years before he died in 2004, my Dad had been fretting that his current house in Cibolo, Texas, had a cheap PVC water supply line from the street. I think he had discovered that fact in the process of investigating a leak. During an Easter visit from California, I offered to dig up the pipe and replace it with copper. My Mom thought we were absolutely crazy to dig up the front yard, but Daddy was quite pleased with the new copper – I think it was the Italian influence. At any rate, it was a very small gesture on my part to help pay him back for some of the help he gave me in the 1980s on my house project.

While working on the water line, we turned over a rock and encountered this 3" tarantula. Texas tarantula's are the warm, fuzzy, lovable ones – not the deadly kind you find in Mexico.  At least that's what I was always told.


The critter next to Dominic's shoe.
The minute we got the copper supply line connected, we began to use the water. Above and below:  My mom Lee fills the trench with water to help settle the dirt as I shovel it back in. I'm not sure what the half-life of a Doritos bag is, but the one we threw in there probably is still there.


Above:  A view of the street-side water meter (foreground) that we tapped for the future-home's water supply. Below: The other end of the pipe, up in the slab area.  We attached a faucet and a hose, and immediately began enjoying the luxury of running water.
 

BELOW, Utilities, Part 2: Before I could get Austin Power & Light (now "Austin Energy") to connect electrical power to the lot, I had to have something to connect it to. I leafed through the Greensheet advertiser and found a used electric-meter loop rig for $40 (below). The city required that I purchase a GFCI outlet/breaker, which cost upwards of $40 back in those days. (Now, they are less than $10.)  But most things are more expensive today. For example, my 1980 building permit from Travis County cost $5, whereas my 2011 permits for my Tea Room addition in Lake Forest, CA, cost almost $800.  Once I had juice, some serious construction could begin.


Below: A sunset view through our oak trees.


By October 1980, it was time to focus on the structural design of the slab, which would require concrete beams under the home's load-bearing walls. This was particularly important because of all the unsettled fill dirt. I consulted with several friends and family members, most importantly my engineer brother-in-law Jimmy, who gave me invaluable suggestions through the course of this project.

The first step was to build 4 concrete piers that would rest on the undisturbed limestone beneath the fill dirt. Again, I hired my local excavator, Bert Teague, this time paying him $137.50 to dig four large holes with his backhoe, plus do some other shaping of the dirt mound and driveway.

In the process, Mr. Teague accidentally snagged some of my freshly buried drain pipes (below).


With the new power-pole (background), I could run a cement mixer to build the concrete piers. I ordered a load of rebar and steel mesh, and began assembling a pile of lumber – much of it used. One day I  borrowed my Uncle Oz's pickup and purchased a load of scrap shiplap board, complete with rusty nails, from the demolotion site of the old Perry Rose Firestone building in downtown Austin.  These would be used in building forms.

Below: A sequence of photos showing construction of the interior piers. Most of this work was done over the Thanksgiving 1980 holiday period.
The upper parts of the piers are formed using cardboard "Sonotubes," suspended using support lumber. They essentially are hanging – so that the concrete can flow through the tubes down into a square, reinforced footing.

Top of a concrete-filled Sonotube. The ceremonial concrete-mixing was conducted by my Dad, my youngest brother, Paul, and myself.

Cut-away view of foundation pier.
A few days after the concrete began to cure, my Dad tested the strength by smashing Pabst Blue Ribbon beer bottles against the footings.
A perfectly formed pier!


The top of a pier, now surrounded by fill dirt. The concrete cross-beams, which will be poured as an integral part of the slab, will be partially supported by these piers.

SNEAK PREVIEW: Below, in the mid-summer of 1981, Billy Yemma nailing plywood sheathing onto the steep, 16/12 pitch roof.


TO BE CONTINUED . . . . . . . . . . . . . . . . . . . . . . . . .

Chapter 3:  Christmas season 1980, final push to prepare the foundation forms.

Tuesday, March 15, 2011

CHAPTER 1 . . . . . . . . . . . . . . . . . . . . . . . . . . . . . . 1980 – Texas boy and English girl want to own land

In the spring of 1980, just a few months after our wedding, Anne and I decided that the quickest and most affordable way for us to become homeowners was to buy a piece of land and build our own house. That would be the ticket out of our tiny, roach-infested efficiency apartment in South Austin.

After viewing dozens of lots in the Austin area – some urban, some rural – we found this gem in Austin Lake Estates: 1/4 acre in the limestone hills above Lake Austin, 8 miles west of the city center.  (We found the lot through a local agent, Barbara Owen, who operated out of a convenience store called the Maverick Market.)

In May 1980 we negotiated a purchase price of $3,600 with the owner, a K-98 FM Austin radio deejay known as "Nick Koster the Imposter."  Though by today's norms that sum sounds ridiculously low, the only way we could scrape the funds together was by using my summer-lump-sum schoolteacher paycheck that I received in May. 

(To pay our bills the rest of the summer, I took a construction-laborer job for $5/hour while Anne worked her first U.S. green-card job as an office secretary in the Travis County Probation Office.)
 

For starters, we had to hire a local guy (Bert Teague) to dig into the back of our lot and install a septic system. We scraped together the funds for that by August 1980. (Cost: $70 for the percolation-test holes and $1,625 for the system.)  Below: The 1000-gallon tank.  


(Note to homeowner-builder:  REMEMBER where the septic tank is buried.  Six months later, I foolishly directed a concrete-delivery truck to back up closer, and closer, and closer . . . and suddenly the cement truck sank into this tank, destroying the top of it.  Fortunately, the septic tank had never been used, so it wasn't too icky to build a new concrete lid for it.)


I paid Mr. Teague an extra $55 to take the excess dirt from the hillside septic-system excavation and build a rudimentary driveway. But before he could get in there with his backhoe, I had to clear the brush. In the process, I contracted an awesome case of poison ivy.  (For anyone reading this who is not a native Texan, the privilege of "clearing brush" is somewhat of a birthright for the male species.
 
I had the backhoe-operator dump all the rest of the hillside dirt into the middle of the lot. Then, in the August heat, I staked out the rough outlines of a future slab and began filling feed bags with dirt and stacking them. One challenge: the sheer height of the dirt pile made it difficult to stake out the diagonals, but using some high-school geometry I was able to roughly triangulate where to place the corner stakes.
Considering that I filled each of 200 feed bags with approximately 80 pounds of dirt, I estimate that I bagged 16,000 pounds of dirt (8 tons).  I didn't worry much about gaining weight in those days!  I bought the used bags at Austin Feed & Ranch Supply on South Congress Avenue – these days, known as "SoCo."

In lieu of a pickup truck, which we couldn't afford to buy, my 1972 Chevy Vega (at right) was enlisted as a construction workhorse – as ridiculous as that sounds. The car, originally owned by my Uncle Tony Yemma in Hartford, CT, went through 4 transmissions and 3 clutches in its lifespan.  Despite landing on a 1980s poll as one of the Top Ten all-time worst cars ever produced in Detroit, that '72 Vega took a licking but kept on ticking. Mainly, because when I wasn't teaching or digging or building, I was working on that car to keep it running. (I did 2 of the transmissions and all of the clutches myself. That's just what you do if you come from South Austin.)

This is a sketch of the rear-elevation of the future house.  Shortly after buying the lot, Anne and I went to the Twin Oaks branch of the Austin Public Library and looked through book after book of house designs until we found a plan we liked –  and that I felt confident that I could actually build. This house, called "The Hideaway," was designed as a chalet-style vacation cabin –  not a true "A-frame," but rather a modified A-frame sitting on "knee walls."
Once we chose the plan, we wrote to the architect, William G. Chirgotis of the National Home Planning Service in Springfield, New Jersey, with some specific questions. Satisfied with his answers, we purchased the detailed blueprints for $90.00.

(Although I had studied some architecture in college, I thought it would be a fool's game for me to try to actually design a place. I felt that I would have my hands full actually building the house, and I simply did not want to have to worry about all the hundreds of little details like doors swinging the wrong way, windows mounted in the wrong places, etc.)


This is a view of the 4" main sewer drain advancing west from the septic tank toward the center of the pile of dirt – which will be the under the center of the house. In those days, we used PVC for drain/waste/vent piping, whereas today most such applications involve the use of black ABS pipe.

PVC, ABS, either way, it's all a hell of a lot easier than what I learned as a kid from my Dad.  When he put an addition (with new bathrooms) onto our South Austin home, he rented a huge chest of medieval-looking tools from Sears that were used to cut iron pipe, melt lead, pound "oakum" rope into the iron joints and put horse collars around horizontal pipe to hold molten lead.  It was incredibly labor-intensive – and amazing.


This is a 3" branch drain to the kitchen-side of the house
September 1980:  Anne was a sport to come out and help me whenever she could, and I don't just mean words of encouragement. She helped me take measurements, hold pipes together, you name it.  If she was around, she was involved, no matter how she was dressed. These photos were taken by Robin Jareaux, my sister-in-law and former journalism artist comrade at The Dallas Morning News.  Below: installing drain pipes for the downstairs bathroom.


Sunset over pipes!
Above & below: Following Martha Stewart's guidelines, Anne helps me cement PVC pipes together without getting dirty.


John Yemma and Robin Jareaux inspect the work in September, 1980, prior to leaving for their new home in Cyprus


Future downstairs bathroom.


Robin, John and Anne at the back of the lot, standing approximately in the area of the septic system drain field, which eventually will become a grassy yard.


Upstairs floor plan.


The first page of an expenses-journal that I used to keep track of the cost basis for the house over the 8-year project . I started this on a typewriter, then went to hand-entries, then made "fancy" forms on my Kaypro II personal computer.


The large dirt pile begins to vanish as I sculpt fill for the future slab.

Respite from the heat: A small wooded area provided shade for breaks from the blistering Texas sun. I spent virtually every weekend and holiday – along with many late-afternoons and evenings after getting off work – trying to meet my self-imposed deadline to pour concrete in January, 1981.
Finished drain-waste-vent piping for the downstairs bathroom.

SNEAK PREVIEW:  This is what the finished house looked like in 1988 when we pulled up stakes and moved to California. 

BELOW:  A final look at the undeveloped lot:


TO BE CONTINUED . . . . . . . . . . . . . . . . . . . . . . . . .

Chapter 2:  Getting water and power to the lot and framing the concrete foundation forms.